◆
tạo hình (shaping) một bi, chùng khối bột (dough) Shaping a boule, slack dough
tạo hình (shaping) BÓNG, CHƯA LỖI khối bột (dough)
Khi tạo hình (shaping) khối bột (dough) chùng xuống, mềm mại, các nếp gấp bổ sung giúp tạo tiền đề cho việc tăng thêm độ căng. Với phương pháp này, khối bột (dough) trước tiên được gấp lại để trông giống hình chữ cái, sau đó lật lại và đẩy và/hoặc kéo để tiếp tục tăng độ căng trên lớp vỏ bên ngoài của khối bột (dough).

tạo hình (shaping) một bi, chùng khối bột (dough)
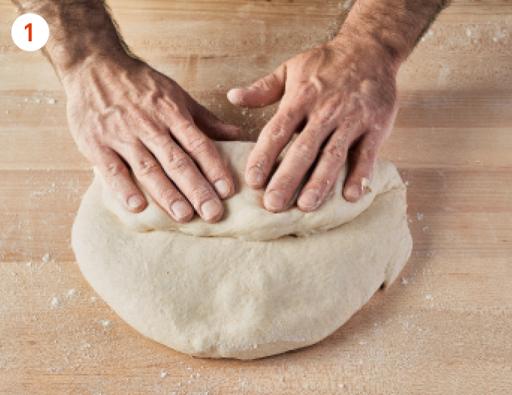
gấp bột (fold) một miếng nhỏ ở đáy khối bột (dough) lên đến khoảng một phần ba đáy và ấn nhẹ để dán.
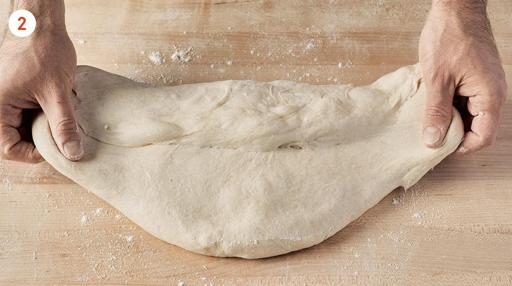
Kéo nhẹ hai góc dưới cùng của khối bột (dough) ra phía ngoài.
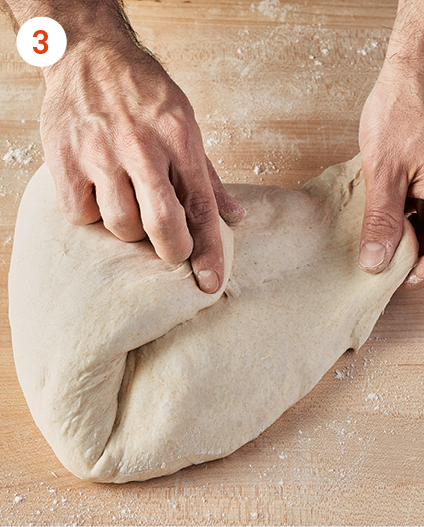
gấp bột (fold) cạnh trái và phải của vòng tròn hướng về giữa, có phần chồng lên nhau nhỏ. Ấn nhẹ để dính.
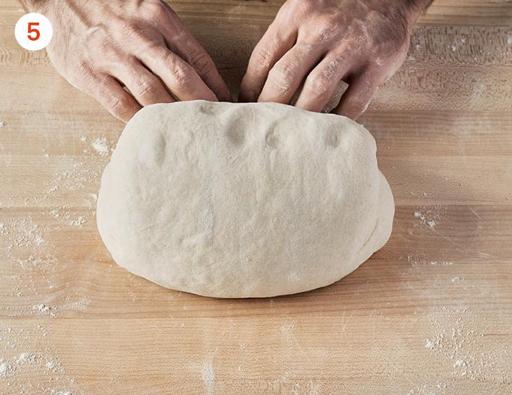
Lấy phần trên và gấp bột (fold) nó xuống toàn bộ vòng để nó chạm vào bề mặt làm việc.
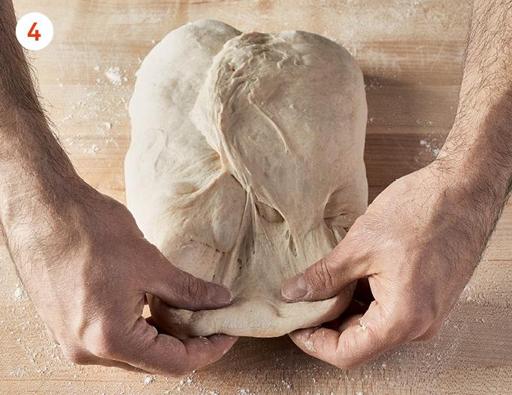
khối bột (dough) sẽ hơi lật xuống khi thực hiện thao tác này và kết quả sẽ là một hình dạng gấp lại với đường may hướng xuống dưới.
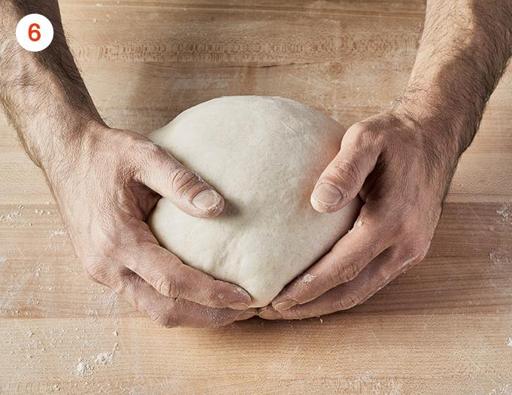
Dùng cả hai tay đặt xung quanh cạnh của khối bột (dough) xa bạn nhất để ngón út của bạn ấn vào bề mặt làm việc. Từ từ kéo khối bột (dough) về phía cơ thể bạn. Bạn sẽ cảm thấy khối bột (dough) bắt đầu siết chặt và kẹp nhẹ giữa các ngón út của bạn và bề mặt làm việc. Xoay khối bột (dough) và lặp lại cho đến khi bạn có khối bột (dough) tròn đều, căng đều trên bề mặt. Để khối bột (dough) nằm yên, mặt đường may hướng xuống dưới, trên bề mặt làm việc trong vài phút để đảm bảo đường may phía dưới được bịt kín trước khi chuyển sang giỏ ủ nở (proofing), mặt đường may hướng lên trên.
SHAPING A BOULE, SLACK DOUGH
When shaping a slack, soft dough, additional folds help set the stage for adding extra tension. With this approach, the dough is first folded to resemble a letter shape, then flipped over and pushed and/or pulled to continue to increase the tension on the outside skin of the dough.
Fold a small piece of the bottom of the dough up to about the bottom third and gently press to stick.
Gently tug outward on the bottom two corners of the dough.
Fold the left and right sides of the round over and toward the middle, with a small overlap. Gently press to stick.
Take the top and fold it down over the entire round so it touches the work surface.
The dough will slightly flip down and over when doing this, and the result will be a folded-up shape with the seam facing down.
Using both hands, cup them around the side of the dough farthest from you so your pinky fingers are pressed against the work surface. Slowly drag the dough toward your body. You will feel the dough begin to tighten and pinch slightly between your pinky fingers and the work surface. Rotate the dough and repeat until you have a uniformly round dough that’s evenly taut across the surface. Let the dough rest, seam-side down, on the work surface for a few minutes to ensure the bottom seams seal before transferring to the proofing basket, seam-side up.